How to Upload Documents in the Client Portal

At Sound Stewardship, we provide a document vault within your client portal that can serve as a repository for documents for which you would like to have remote access. It also provides a secure way to share documents back and forth with your service team. Below are the steps to use this resource, along with a quick video that demonstrates the process.
How to Upload a Document to the Vault
1. Navigate to the Sound Stewardship website: https://soundstewardship.com/.
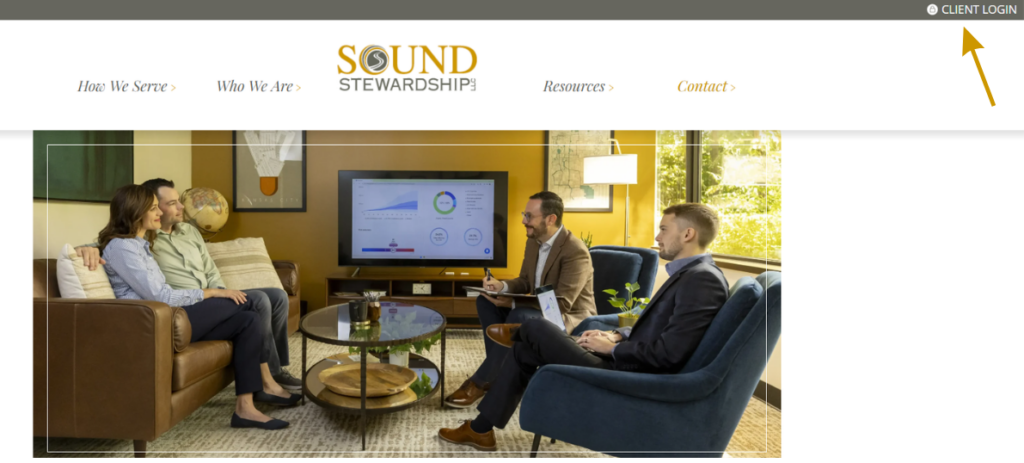
2. Click Client Login in the upper-right corner.
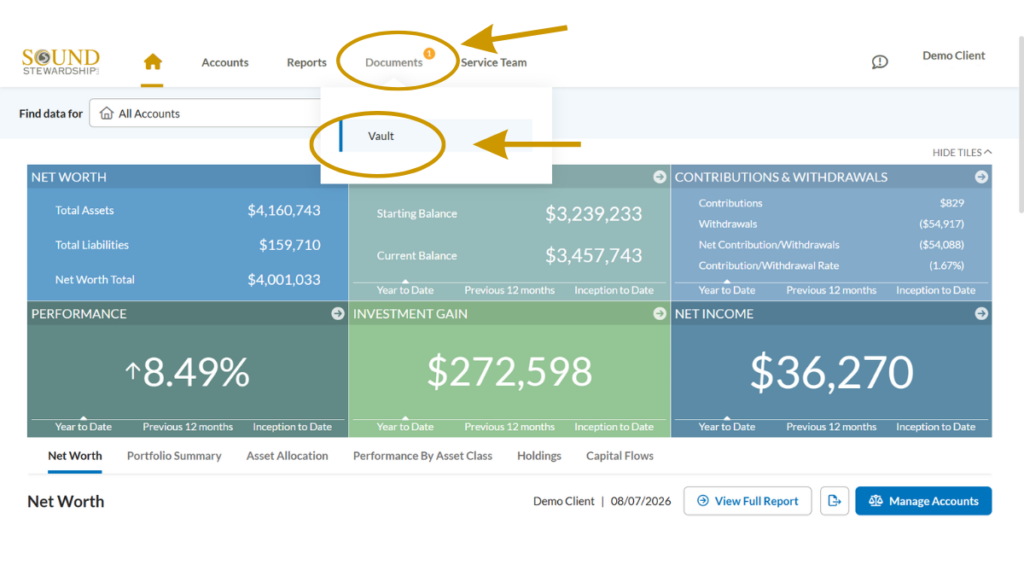
3. Once logged in, navigate to the Documents section on the top bar. Then select Vault.
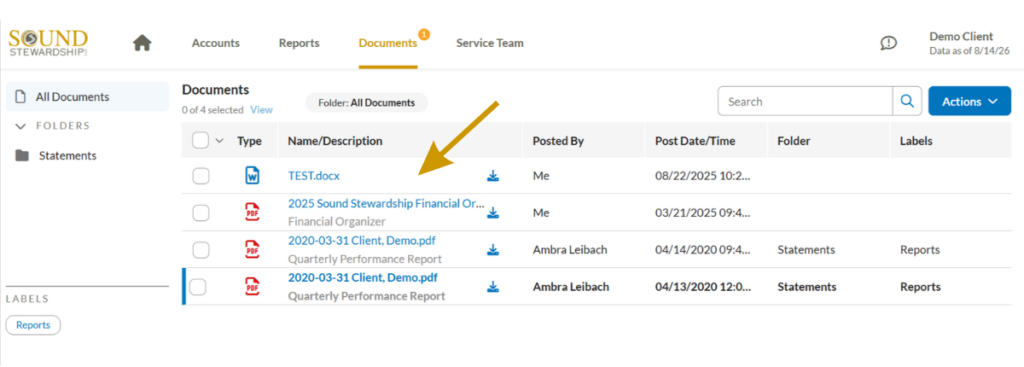
4. In the vault, you will see a list of documents that we have either sent to your vault or that you have uploaded to the vault.
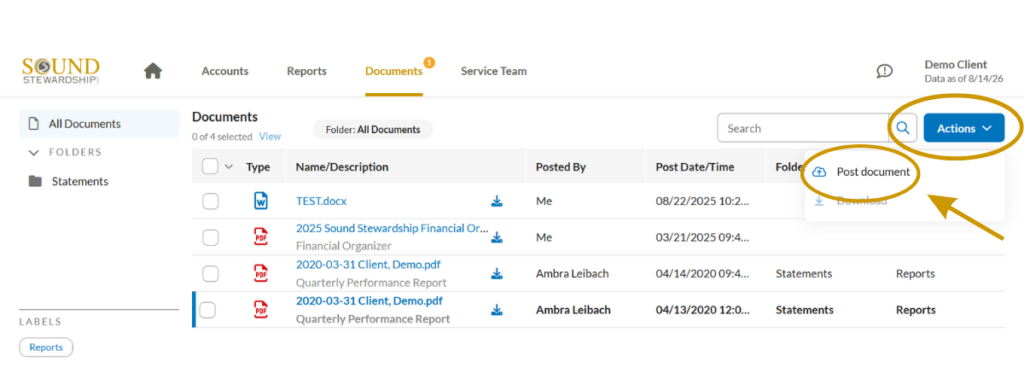
5. To add a new document, click on Actions and select Post Document.
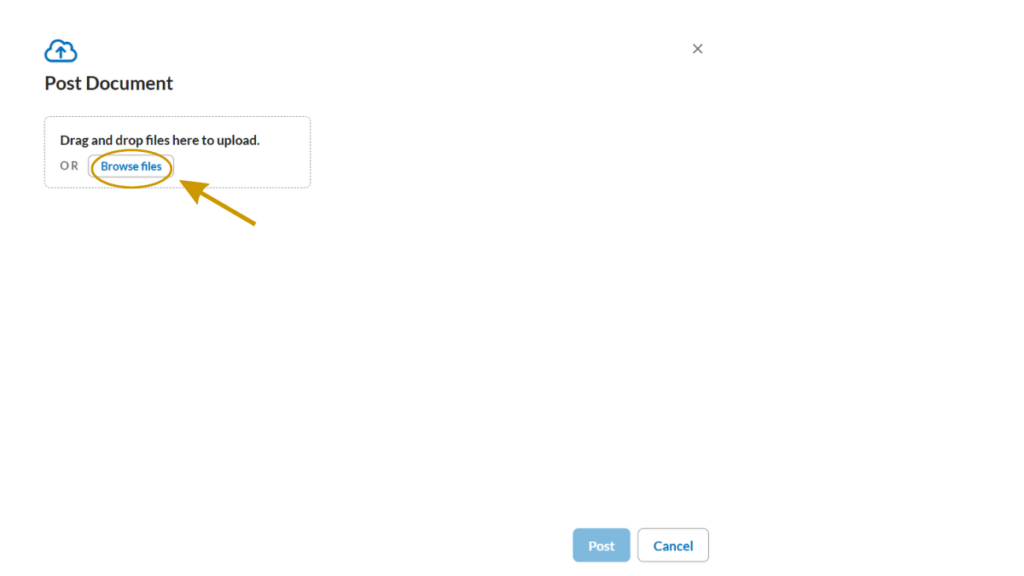
6. Once the Post Document window opens, you can either drag a file into the box or click Browse files to find the file you wish to upload.
7. Once you add the file(s) to the box, click the Post button. You can select multiple files as a group to move to the box, but you cannot select a folder of files to be moved to the box.
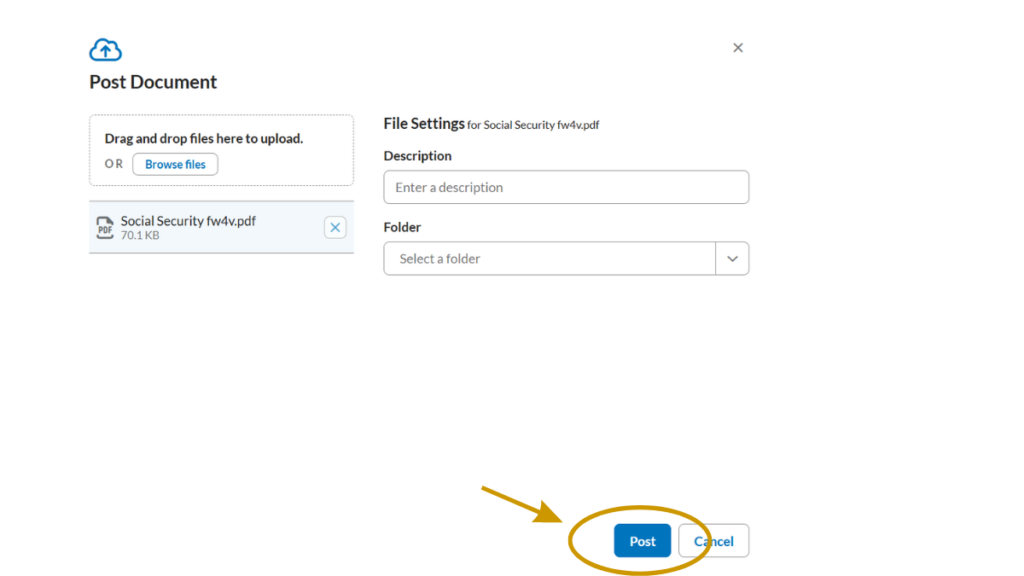
Note: You do not need to enter a description unless you wish to do so. The filename will be visible helping the service team identify the document.
8. Once you click Post, the file should be visible in your list of documents.
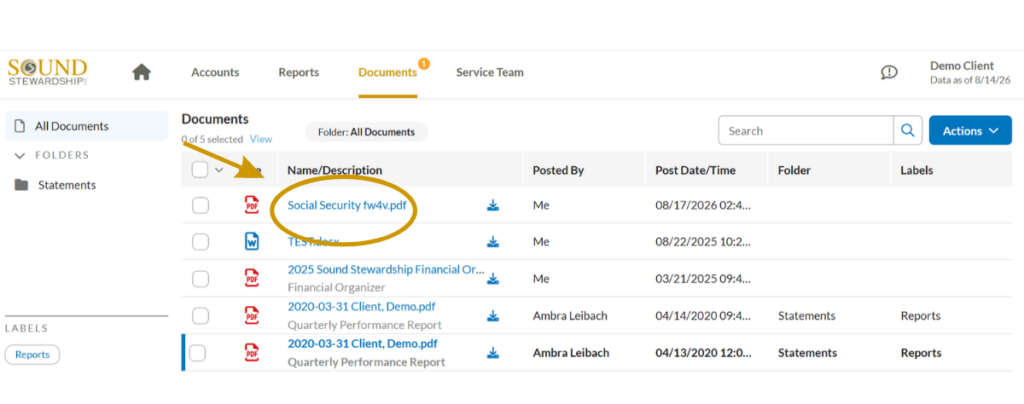
Note: The portal does not allow you as a client to delete a document. If you wish to remove a document from the vault, just let your Sound Stewardship team know and we can delete the file.
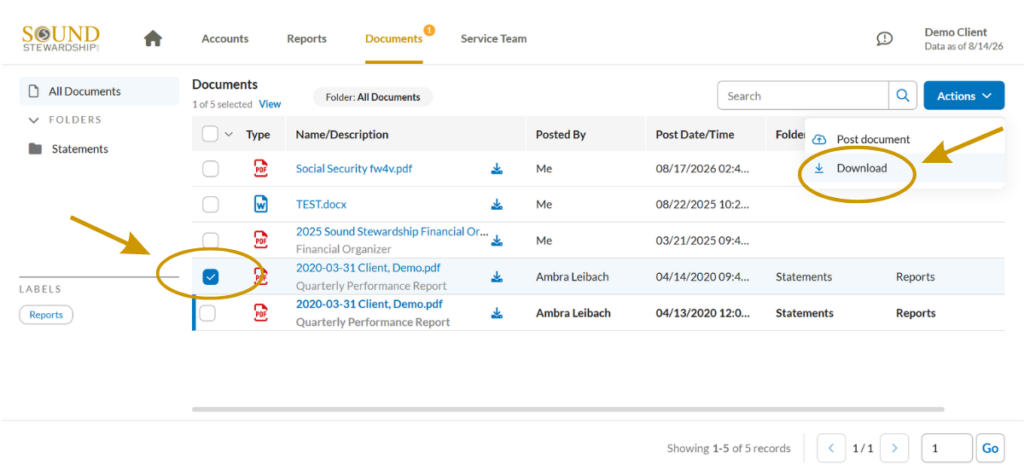
9. If you have received a file from us in your vault, you can download that file to your computer by checking the box next to the file name and then selecting Download from the Actions box.
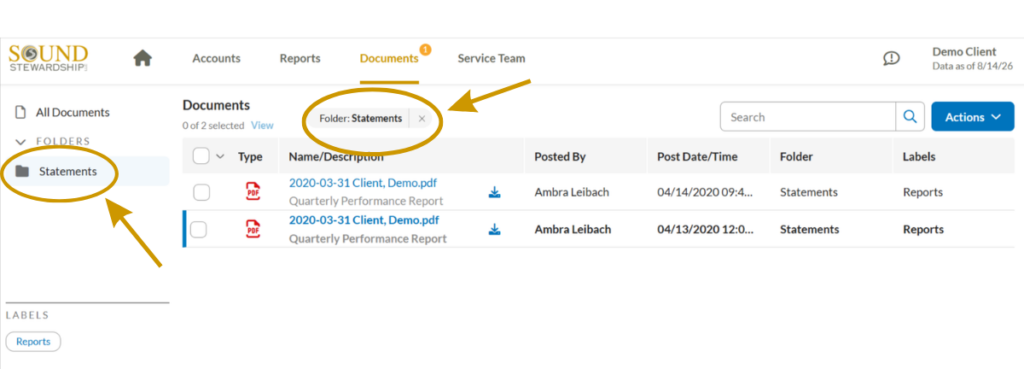
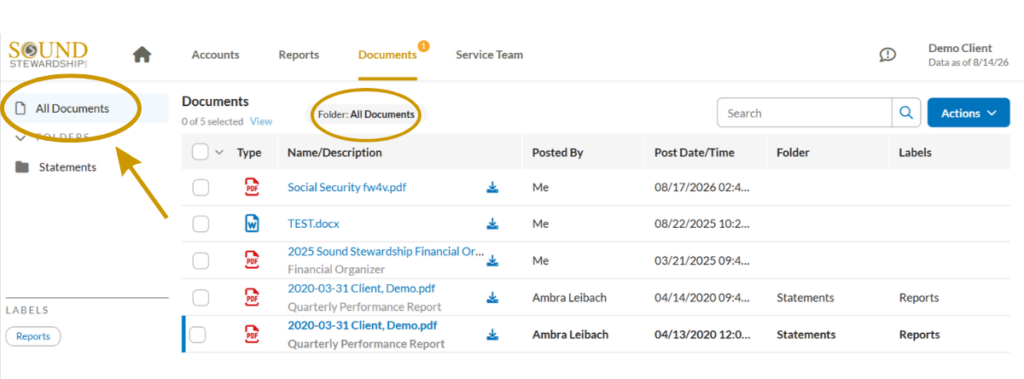
10. When searching the vault for a document, make sure that you are at the “top” folder level by clicking “All Documents” and that no specific “Labels” are selected. Click the X to remove any label-based filtering.
11. Log out of your portal.
Thank you for taking the time to upload your documents. Below, we’ve also included a video demonstrating this process. If you have questions, please let us know.